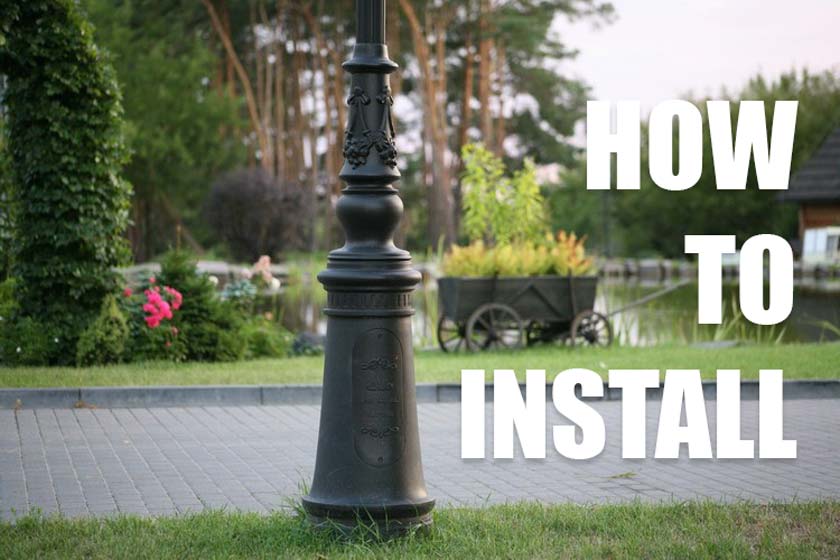
Here Vietnam Cast Iron provides 8 simple steps to install outdoor cast iron lamp post. Check this post and make your curb appeal shinning.
Lamp post provides not only illumination but installing lighting fixture to beautify the curb appeal is becoming a trend in the market nowadays.
If you are looking for some guidance to install outdoor lamp post for your landscape, this post is for you.
Installing an outdoor lamp post may easier than you think. Here Vietnam Cast Iron will guide you step by step so that everyone could help yourself.
- 1. Step 1: Choose the Right Lamp Post
- 2. Step 2: Choose the place to install the lighting post
- 3. Step 3: Dig the Hole and Trench
- 4. Step 4: Install the conduit
- 5. Step 5: Place anchor bolts and conduit
- 6. Step 6: Pour the concrete
- 7. Step 7: Insert the lamp post and connect the wiring
- 8. Step 8: Check how lamppost work
1. Step 1: Choose the Right Lamp Post
There is a variety of outdoor lighting posts in the catalog so make sure you choose the right one for your curb appeal. First, plan in your mind what is your purpose? You need a functional lamp post for the only illumination or you care more about the decorative property.
Depending on your need, you can consider different model, design and height for your application.
The material is also very important because it decides the quality’s lamp post. We recommend to use cast iron lamp post to ensure the quality and also the appearance.
You can find the best Lamp posts of VIC here: https://vietnamcastiron.com/product-category/lamp-post/
2. Step 2: Choose the place to install the lighting post
When you got your lamppost in your hand, the next step is to decide where to place the post lighting to provide not only enough illumination but also eye-catching at the first sight.
And also don’t forget to choose where you can easy to connect to power lines.
3. Step 3: Dig the Hole and Trench

Almost lamp posts requires the foundation, or often called footer buried underground to stabilize the lighting fixture.
Use a posthole digger or round shovel to dig the hole. Make a hole with 30cm diameter and 60cm deep.
Also, you will need a trench to line the power supply with the lighting post. We recommend you should trench a line which nearest the power supplier to the lighting fixture.
The trench should deep at least 30cm and provide enough wide to insert the conduit.
After that, use a piece of plywood to separate the footer from the trench. Don’t forget to drill a hole in the plywood block. Make sure the drill hole is wide enough for the conduit fit through.
4. Step 4: Install the conduit
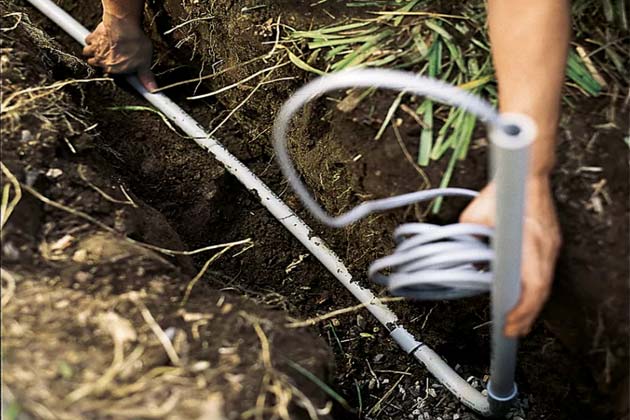
The conduit will protect the electrical line for the outdoor lamppost from being moisture when place underground.
We recommend you use a gray PVC electrical grade pipe. If there are any turns in the line, use 45-degree angle or 90-degree couplings to make the connection.
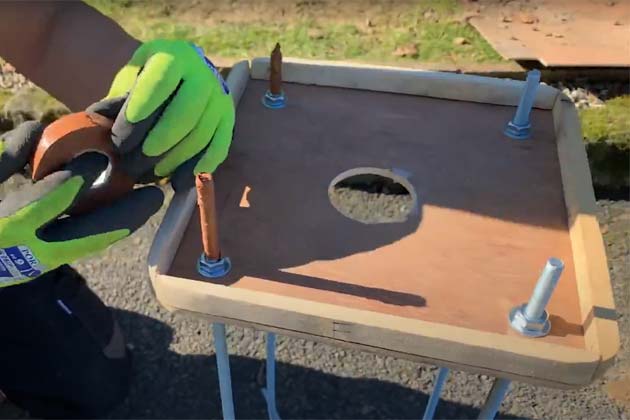
5. Step 5: Place anchor bolts and conduit
Prepare plywood that is wider than your foundation hole more than 20cm. Drill the hole in the plywood for the conduit and anchor bolts fit through.
Next, place the anchor bolts and screw nuts onto the ends suspending them into the foundation. Install stakes around the edges of the plywood to anchor it to after pouring the concrete.
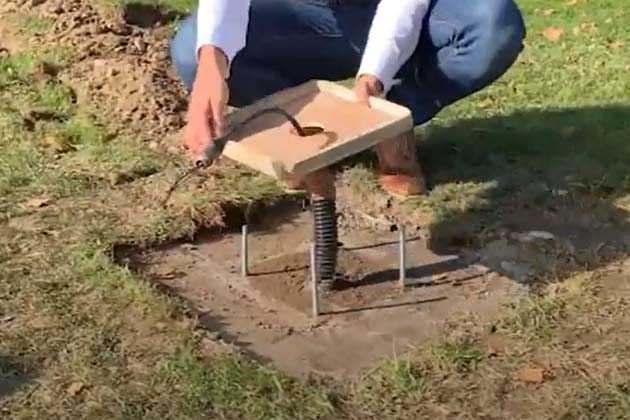
6. Step 6: Pour the concrete
You can use a concrete mixer or manual mixing. Next, pour concrete mixture into the hole. Make sure the hole is filled uniformly and evenly.
Place the plywood and anchor it with the stake you installed in step 5. Place the anchor bolts and make sure that they are straight vertically and firmly position in the concrete. Allow the concrete dry for half to a day.
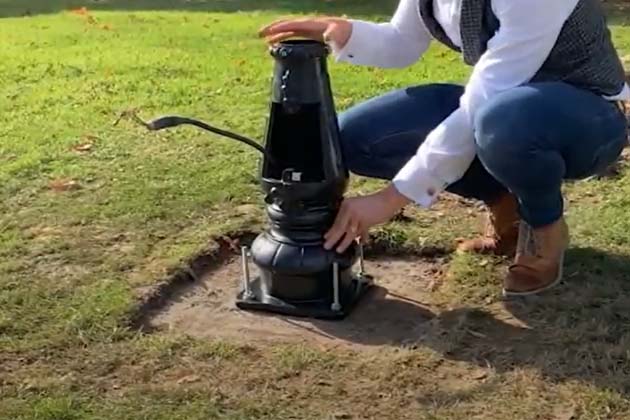
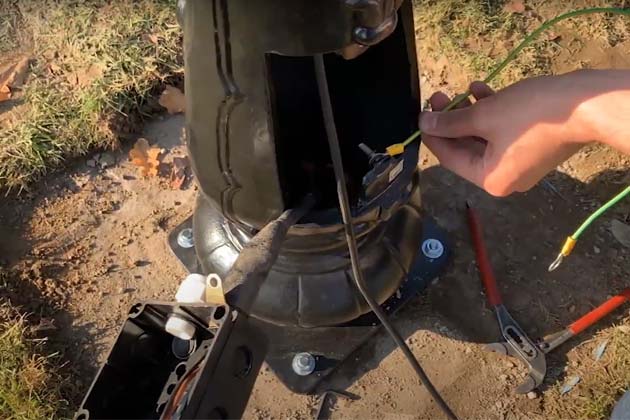
7. Step 7: Insert the lamp post and connect the wiring
Once the concrete is hard, remove the nuts from the anchor bolts and replace the plywood template by the lamppost basement.
Position the anchor bolts in the lamppost base. After that, attach the pole and the lamp to the pole.
Connect the wiring through the conduit to the lamppost fixture.
8. Step 8: Check how lamppost work

To the step 7, the work is done, but you have to check again how the lamppost works. Complete an assessment as a whole to ensure everything is secure and safe.
Also don’t forget to check the Lamp post’s quality every few months to make sure there isn’t any defect. If you find any defects, you should perform maintenance on your lamp post immediately.
VIC provides the above guide on how to install outdoor lamp post pretty detail step by step. However, please note that we always recommend a qualified electrician is used for lamp post installation. If you want to help yourself, be careful with the electric working.
Also, if you are looking for lamp post for your garden or street, feel free to contact Vietnam Cast Iron to make an order. We are both cast iron lamp post and aluminum lamp post manufacturer and wholesale to the world market.
Browse our website and check our product category to get more information.